Translate

Sunday, February 24, 2013

A Bee for Wren...

Finally found the perfect bee charm for wren.


It is now affixed to the back of her Celtic knot charm. I'd been looking for a bee for her ever since I'd finished her and took her outside for her first photo shoot (see older pics). A great big bee sat right on her nose and wouldn't move for several minutes!


She looks a bit frazzled here but I can hardly blame her. Well if some naming ceremony stories are to be believed then when the baby is first brought out of the hut, the first animal it encounters is what its named for to commemorate the event. So the charm finally helps commemorate that. And who knows, since Wren will be one of the girls I'm taking to Hawaii with me ( I haven't chosen the other girl yet) I may just find out what the Hawaiian for bee is and give her a second name or a surname : )

Friday, February 15, 2013

Naming the Green Girl...

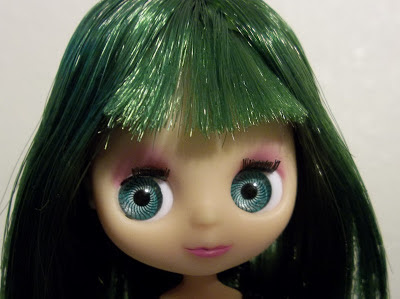
Well my nameless girl has successfully had her hair dyed green : )


I still haven't decided what to name her yet... a few names I've been rolling around in my head: Lotus, Ivy, or Envy (as in green with). The color turned out so well I'm looking forward to doing another girl pink or mango : )

Sunday, February 10, 2013

The wearing of the green...

I've got a new little petite (no name yet, I bought her strictly for customizing) and I'm dying her hair green...


Please if you can try to ignore my cluttered kitchen. : )

I used the same technique here with the petite's hair that I do with full size Blythes which is as follows...

"Wash the hair first. Use just enough water to submerge the scalp in. Add a pinch of salt, a little laundry detergent and the RIT package. Stir it while it heats up and, when it comes to a good, roiling boil let it sit for another minute or so. If it starts to bubble up, just keep blowing on it.

Then dunk/swirl the hair around until you get the color you want. If you need to, you can heat the water back up on the stove. Rinse until the water runs clear and then wash the hair with dish soap to get all of the excess color out."

These instructions for hair dying were given to me ages ago by a helpful This is Blythe forum member who's name I've long since forgotton, but if you are the one who helped me out and you see this post give me a shout and I'll credit the technique to you straight away. : )

Now when I did this to Wren's hair I removed her scalp entirely so there was no chance of the doll's head getting stained, and for those who don't want to remove the scalp, I understand that a lot of people tape off the doll's "skin" or wrap the doll in Seran wrap before dying the hair to keep the dye off the body. But in the case of this petite I simply dunked her hair in and gently swirled her about in the dye while letting the color wick it's way up to the scalp. It seems to have taken quite well but we shall see...

In the meanwhile...


...a little something to groom her bangs back into place. I have no headband for her of course, but this little fruit band seems to be doing the trick. I'll give an update on how she looks when her hair drys out.

A bit of Aloha

It's always fun when you come up with new things you can do with a pattern, and in that spirit I present... Hawaiian shirts : )


The pattern of course is the collared shirt pattern available on puchicollective. The only difference here is that after I printed the pattern out to the proper size I snipped a half inch off both the arms, making it the perfect sleeve length for a little Hawaiian shirt.

Now obviously there's a lot you can do with this, and of course a great deal of the Hawaiian look of the shirt is due to the fabric itself. Here I have Cheri and Moonyeen in some very striking red and white prints. But you can also try for a more subtle look...


Here's Moonyeen again (this time with blond hair) in a little green floral print, and Wren in a pretty blue fabric.


And getting away from shirts for a bit, I even made a little something for Betts...


Still in the same bold red print as Moonyeen's shirt but this time using the lovely Aloha dress pattern by xoxo, Blythe. Can you tell I've got Hawaii on the brain?  I'm going to be heading there next month : )

I've had a lot of fun with these patterns, much, much thanks going out to their creators! I'll definitely be experimenting more with Hawaiian shirts... they sew up pretty quickly and are such fun to do. I think little brown polymer clay "coconut shell" buttons would bake up in the oven quickly and make just the right finishing touch.

I'm dying to find a nice Holoku patten that would fit Blythe, but I'm so particular about how I want it to look I might just have to come up with my own. Still the search goes on : )

Tuesday, February 5, 2013

Don't Blink

I received my swap package yesterday from my partner and I was completely blown away by it. She definitely has talent!


I love all the little dolls in this one! The matryoshka doll has so much detail! She looks exactly like the doll on the dress! I'm gonna have to get more pics of these!


This is just so beautiful! I love the bright colors and the little embellishments!


And it comes with a little matching hat! I just had to take this shot outdoors.


I never would have guessed that Wren would look so pretty circled in fur...


And this is the Doctor Who dress she hand painted! I can't believe how gorgeous this is!


...and the detail on this! It's just amazing! I particularly love the bow tie and the lace at the throat, it's gives it a real vintage almost steampunk verve. A big thank you to naomprice! This girl truly has skills!

Thank you! Thank you! Thank you! I just can't say it enough : )

Dolls for Dolls...

I took part in another Blythe swap. This time the theme was dolls for dolls. The idea is to make or procure dolls for our partner's Blythe dolls. Possibly also making them matching outfits. This swap has been all kinds of fun.

Here's what I came up with for my swap partner...


As you might have guessed my swap partner is a Doctor who fan (as am I) So I made a fem version of the 11th Doctors outfit! This was so much fun to do, and I even made an optional fez for fun.

And for the dolls that go with this outfit...


These were some adorable little charms that I bought on Etsy. Obviously you can see which one the outfit is supposed to match up with : )

And here's the other dress / doll combo I came up with


I knit up some little sock monkeys and made a little dress to match it with a cute sock monkey print!


And lastly, some cute odds and ends...


Hmmmm.... if your dolls have dolls, and their dolls have dolls... does that mean you can have a house full of dolls and be said to only have one or two? Oh the possibilities!  : )