Well I've been wanting to do something fairy themed with my petites for some time, so when the latest swap I'm taking part in was Mystical Garden Creature themed I decided I had to jump on that. Here's one of my ideas for the swap...
These were such fun to make. The dresses are simply 15 stitches on size 1 needles. You start with a couple rows of garter stitch (2 to 4, your choice) then continue in stockinette until you reach a length you like that comes just up to the bust, bind off on both sides leaving 5 live stitches in the center. Continue in garter stitch for 2 to 3 more rows then bind off. Seam up the back and attach straps to tie around the neck. That's it! :)
Now the wings are a different matter. Once you've finished the dresses you can attach wings of your choice. I used E6000 to attach these wings and it works really well. For those who don't know, E6000 is an industrial strength adhesive and it can glue just about anything to anything. It's excellent stuff and I use it in many of my crafting projects. The wings I used are those silk flower butterflies that have recently been showing up in silk flower bushes and garlands. I'd been seeing a lot of them at Micheals lately and since I needed some flowers for another project I saved the butterfly wings for just this purpose. The swap finally gave me the excuse I was looking for to put them to use. If anyone wants to use wings like this, it might be a good idea to fray check the outer edge of the wings (I did) because just like silk flowers they will fray a bit with repeated handling.
This was such fun... now what other Mythical Garden critters could I make... gnomes? sprites? pixies? hmmmm... I'll have to think on it. :)
Translate
Friday, June 14, 2013
Tuesday, June 11, 2013
Point and Click
Just picked up this lovely little toy for Wren...
It's an adorable little camera key chain (I removed the split ring and chain of course... I plan to put a little black wrist strap on there so Wren can tote it about).
It's the cutest little thing and we are selling them now at Micheals. Naturally I had to get Wren one, she's been jonesing for a camera for quite some time.
And it even has a flash and sound....
Sunday, June 2, 2013
A Hard Look at... Eraser Food
I've heard a lot of talk about eraser foods and weather or not they're an appropriate accessory for Blythe. Obviously some people like them, some don't care one way or the other, and some downright hate the little buggers.
Personally I fall into the middle category, they seem cute enough, and I can easily see them working in a photo shoot. As far as lasting ability... well I've never kept any around for that long, I usually snap a few photos and then hand them over to my niece to play with. But lets face it, they are erasures. Anyone who's had to dive into the supply drawer (and you know which drawer I'm talking about.. the one filled with all the little bits and bobs we never seem able to throw out because, God help us, those things might be useful) quickly discovers what becomes of erasures after they sit around for several years. They dry into some nasty crumbly version of their former selves which have lost the ability to even do what they were intended for... erase.
But what of erasure food? Is it a good miniature for Blythe? If by miniature you mean a dainty little keepsake that you hand down to your grandchildren then heck no... not even close. But if you mean something small, cute, and dare I say fanciful (and yes you have to admit it some of them are), as well as inexpensive and easy to find, then these little guys work just fine. They can make adorable little props in photos, and (as far as photo shoots go) what they lack in lasting power they make up for in ease. Besides how many pics can you take of those miniature drinks you bought on Etsy before you get bored and put them back on the shelf to gather dust. : )
Thursday, April 11, 2013
A Passion for Purple
My favorite color swap came in. And as you might have guessed. The color was PURPLE!
My swap partner, Anne of AnneArchy, sent me the most wonderful stuff. There were some wonderful crafting materials which I can't wait to break into. As well as two hats, a sweater top and skirt set, and a lovely green and purple sweater. They are all so perfect. She definitely has skills!
This is Betts in the little sweater set... so sophisticated!
And Cheri in the purple and green number
Moonyeen and Wren quickly snatched up the hats for themselves...
...and even little Ivy (yep that's her name now) "borrowed" the gnome's hat and claimed the My Little Pony :)
All in all this was an awesome swap to participate in, I had fun creating and picking out the items to send and I received the most wonderful things! Who would have thought that just color alone would make such a fulfilling theme : )
Sunday, April 7, 2013
In the Pink
March's theme for the Blythe swap was favorite color. I knew I had to join in with this one as it seemed like it would be terribly fun, and it was. My swap recipient chose the color baby pink, and here's what I sent...
And an assortment of very pink things. The pull string bag has many little secret pockets inside and was sewn by my mother-in-law Joan. It was Hello Kitty and baby pink so I thought it would work out nicely for storing shoes and accessories for photo shoots. The pressed penny is from Hawaii, she said she collected pressed pennies so I thought she might like one from the Aloha state. The shoes are MiMi Woo. And the rest is candy, assorted hair chips (note the bunny ears... I couldn't resist!), and some hounds tooth fabric in baby pink for her to play with. I have to say this was a pretty fun swap. With just color as the theme the territory was pretty open. I had a wonderful time of it!
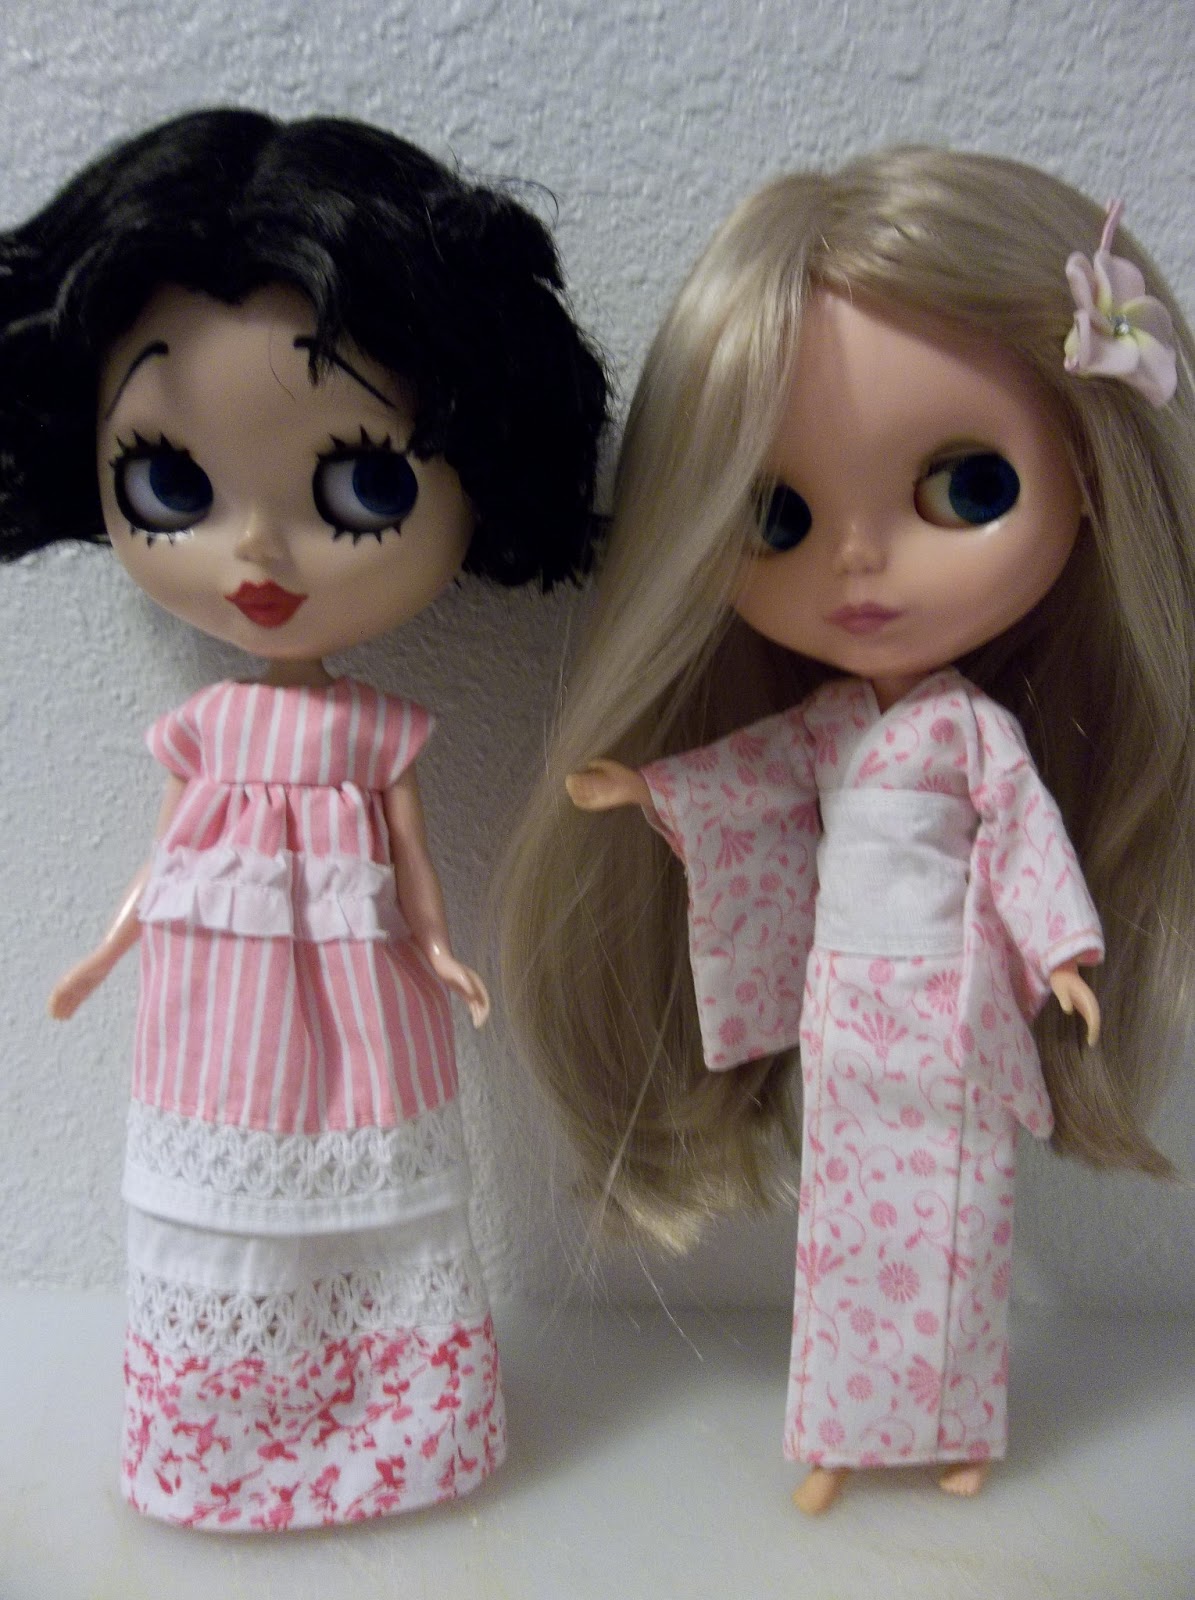
This is Betts and Moonyeen in an Edwardian tea dress and a kimono respectively.
And the view from the back. I just had to show off the Obi.
Monday, March 25, 2013
Back from Paradise
Well we're back from the Big Island. Had a really wonderful time in Captain Cook and hanging out in the Kona area. Very fun! As you can see Wren and Cheri got the chance to sport their new swimsuits...
Oh... and here is my mother-in-law's doll Noni. I gave it to her as a gift years ago and I gifted her the houndstooth jacket and bowler hat she's wearing here.
But I think the most exciting thing I did craft wise was working with Joan (my mother-in-law) and finally creating a relatively decent pair of holokuu dresses for the girls, we decided to do a modification of the A line dress featured on pucci collective and we came up with these...
And this is Wren next to a lovely Ohia blossom. sporting one of the little Hawaiian shirts I made.
And here's Cheri hanging at a little salt and pepper snorkel beach...
But I think the most fun we had was on the black sand beach. Where we had the luck of seeing five (FIVE!) turtles come up onto the beach to sun themselves on the warm sand...
I couldn't get all five into the shot but you get the picture, it was a pretty exciting day.
And thanks to Joan I had use of some fantastic hula props for the pictures...
As you can see Cheri is holding a pair of Pu'ili (a sort of slatted bamboo slap stick) which Joan lent to me, and Wren has next to her a nice 'Uli 'Uli or feathered gourd, which was a gift from Joan. : )
And this was just for fun.
Much love and Aloha to you all. And mahalo to our friends in Hawaii, you made us feel so welcome!
Friday, March 8, 2013
In Celebration of Hawaii...
I've decided to share one of my older patterns in celebration of my upcoming trip to the Big Island. Here is the pattern for my one piece swimsuit for Blythe (been working on a few of these for the trip myself).
For these you have to know how to knit garter stitch in the round and flat, and it's knit in size 10 crochet thread so be aware of that.
If you want to sell finished products made from my patterns you may, but please give me credit as the designer in all listings. The pattern itself is copyrighted and no part of it may be reproduced (by any means) for sale. © Monica Bovee
Using size 10 crochet thread and size 0 needles
Cast 42 stitches on to size 0 double points. Distribute the stitches evenly (if you are using a set of 4 double
points that's 14 stitches per three needles)
1. Purl one round, as you work place a marker at the beginning and 21 stitches in (splitting the round into two
sets of 21 stitches each). You can just use the cast on tail at the beginning as a marker if you like.
2. *k 9 stitches, slip 1, k2tog, psso, knit to marker* Repeat on second set of stitches. (38 stitches remaining)
3. purl the round.
4. *k 8 stitches, slip 1, k2tog, psso, knit to marker* Repeat on second set of stitches. (34 stitches remaining)
5. Purl the round.
6. *k 7 stitches, slip 1, k2tog, psso, knit to marker* Repeat on second set of stitches. (30 stitches remaining)
7. Purl the round
8. k 6 stitches, slip 1, k2tog, psso, knit to marker* Repeat on second set of stitches. (26 stitches remaining)
9. Purl the round.
10. k2tog, k to two stitches before marker, k2tog, k to end (24 stitches remaining)
11. P2tog, p to two stitches before marker, p2tog, purl to end (22 stitches remaining)
12. Repeat row 10 (20 stitches remaining)
Do 11 more rounds in garter stitch starting with a purl row.
24. Bind off 8 stitches. Transfer remaining stitches to a single needle, you will now be working flat. k 5, transfer
the last two knit stitches back on to the left hand needle, drop the 1st of those two stitches that you transferred
over the 2nd, then slip the 2nd stitch back on to the right hand needle. Bind off 1 stitch and then knit the final 4
stitches.
23. K5, cast on 2, k5.
Work in garter stitch for 8 more rows then bind off leaving a long tail. Draw a bit of the same color crochet thread
up though the peephole and tie up the middle section to form the cups for the breasts, then attach two braided
straps to the top corners to tie around the doll's neck. Sew 2 or 3 stitches at the crotch and tie off. Weave in ends.
Enjoy : )
Subscribe to:
Posts (Atom)